

Manage storage and tiering
Configure high-performance and low-cost object storage tiers in Tiger Console
Tiering splits hot data on fast local volumes from cold data in cheaper object storage. Tiger Cloud implements that as a high-performance tier plus a low-cost object storage tier:
-
You use high-performance storage to store and query frequently accessed data.
-
You use low-cost object storage to cut costs by migrating rarely used data from the high-performance storage. After you enable tiered storage, you then either create automated tiering policies or manually tier and untier data.
You can query the data on the object storage tier, but you cannot modify it. Make sure that you are not tiering data that needs to be actively modified.
For low-cost storage, Tiger Data charges for data tiered based on its original uncompressed size in the high-performance storage tier. There are no additional expenses, such as data transfer or compute.
High-performance storage tier
Section titled “High-performance storage tier”By default, Tiger Cloud stores your service data in the standard high-performance storage. This gives you up to 64 TB of storage and a configurable IOPS value to better suit your needs:
- Select your service
In Tiger Console, select your service, then click
Operations>Compute and storage.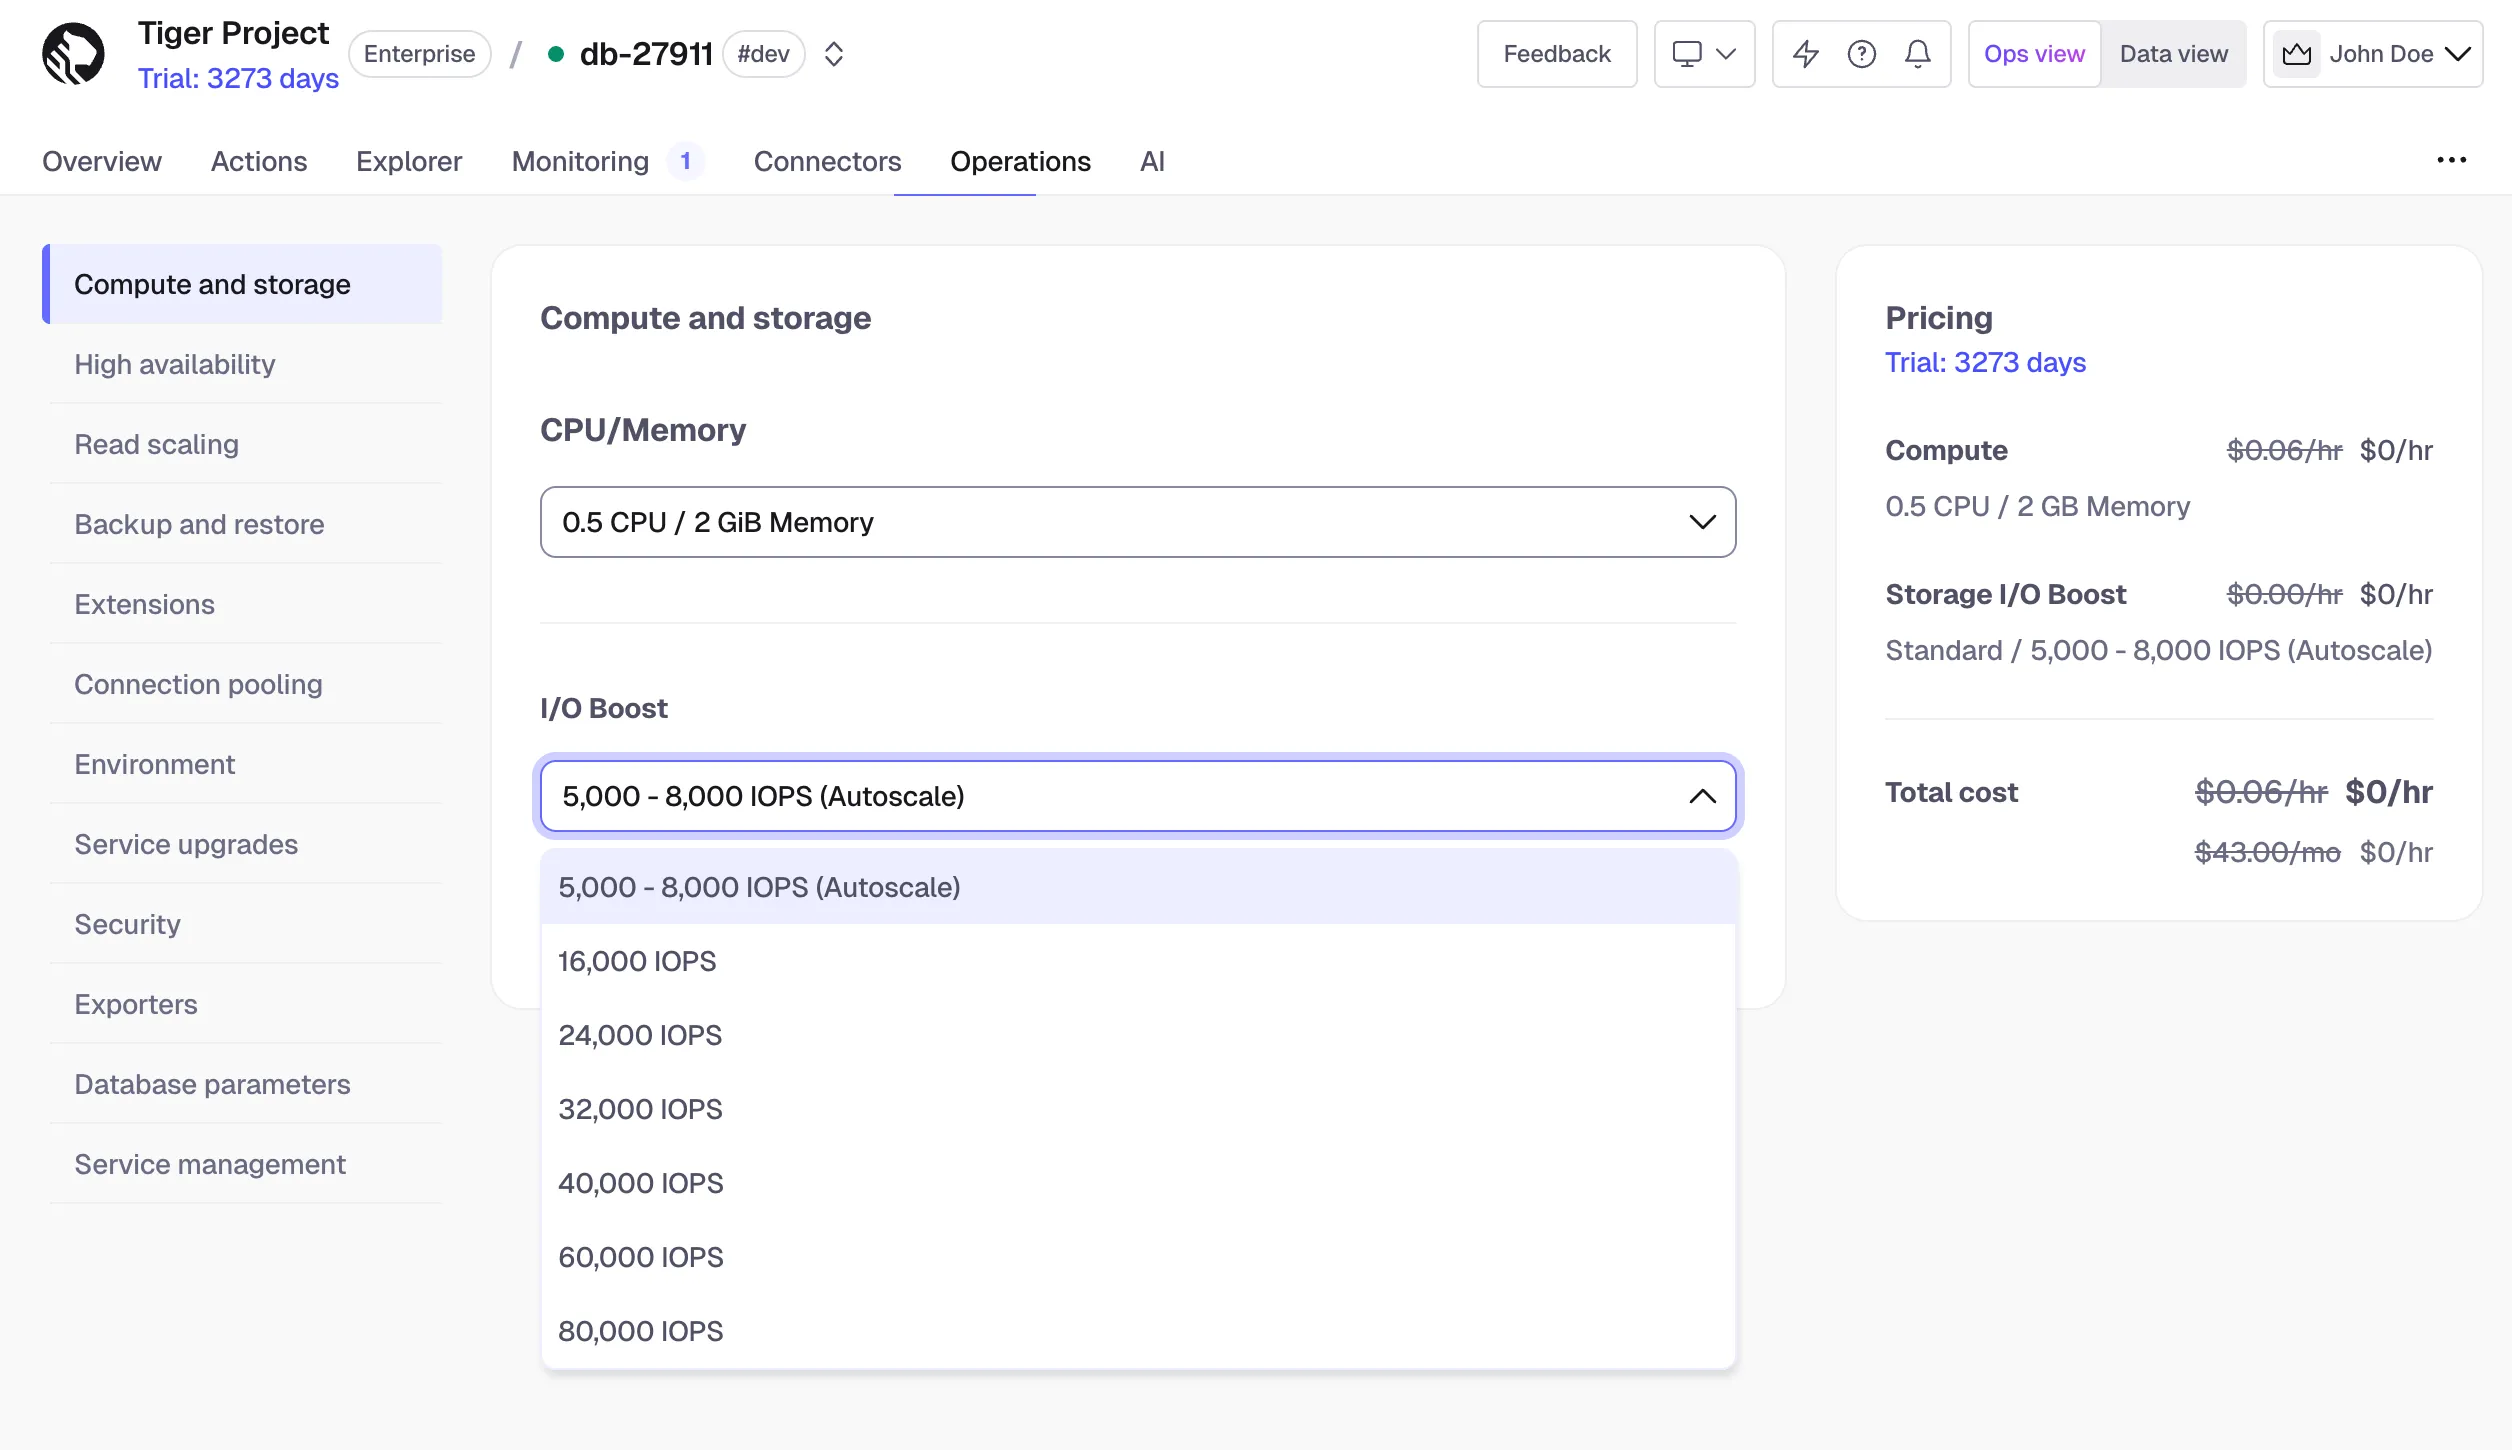
- Select the IOPS value
Select the IOPS value in the
I/O boostdropdown:- Under the Performance pricing plan, IOPS is set to 3,000 - 5,000 autoscale and cannot be changed.
- Under the Scale pricing plan, IOPS is set to 5,000 - 8,000 autoscale and can be upgraded to 40,000 IOPS subject to your service’s CPU configuration.
- Under the Enterprise pricing plan, IOPS is set to 5,000 - 8,000 autoscale and can be upgraded to 80,000 IOPS subject to your service’s CPU configuration.
The available IOPS and the corresponding throughput depend on your service’s CPU, cloud provider, and the pricing plan:
-
Tiger Cloud on AWS
Pricing plan Min CPU IOPS Throughput, MB/s Scale/Enterprise Under 16 16,000 1,000 Scale/Enterprise 16 24,000 1,000 Scale/Enterprise 32 32,000 1,500 Scale/Enterprise 32 40,000 1,500 Enterprise 48 60,000 1,875 Enterprise 64 80,000 2,000 -
Tiger Cloud on Azure
Pricing plan Min CPU IOPS Throughput, MB/s Scale/Enterprise n/a 16,000 1,000 Scale/Enterprise 16 24,000 1,000 Scale/Enterprise 32 32,000 1,200 Scale/Enterprise 32 40,000 1,200 Enterprise 48 60,000 1,200 Enterprise 64 80,000 1,200
- Click
Apply
Low-cost object storage tier
Section titled “Low-cost object storage tier”Low-cost tiered storage is available on Scale and Enterprise pricing plans.
You enable the low-cost object storage tier in Tiger Console and then tier the data with policies or manually.
Enable tiered storage
Section titled “Enable tiered storage”You enable tiered storage from the Overview tab in Tiger Console.
- Select your service
In Tiger Console, select the service to modify.
- Enable tiered storage
In
Explorer, clickData Tiering> then clickEnable tiered storage.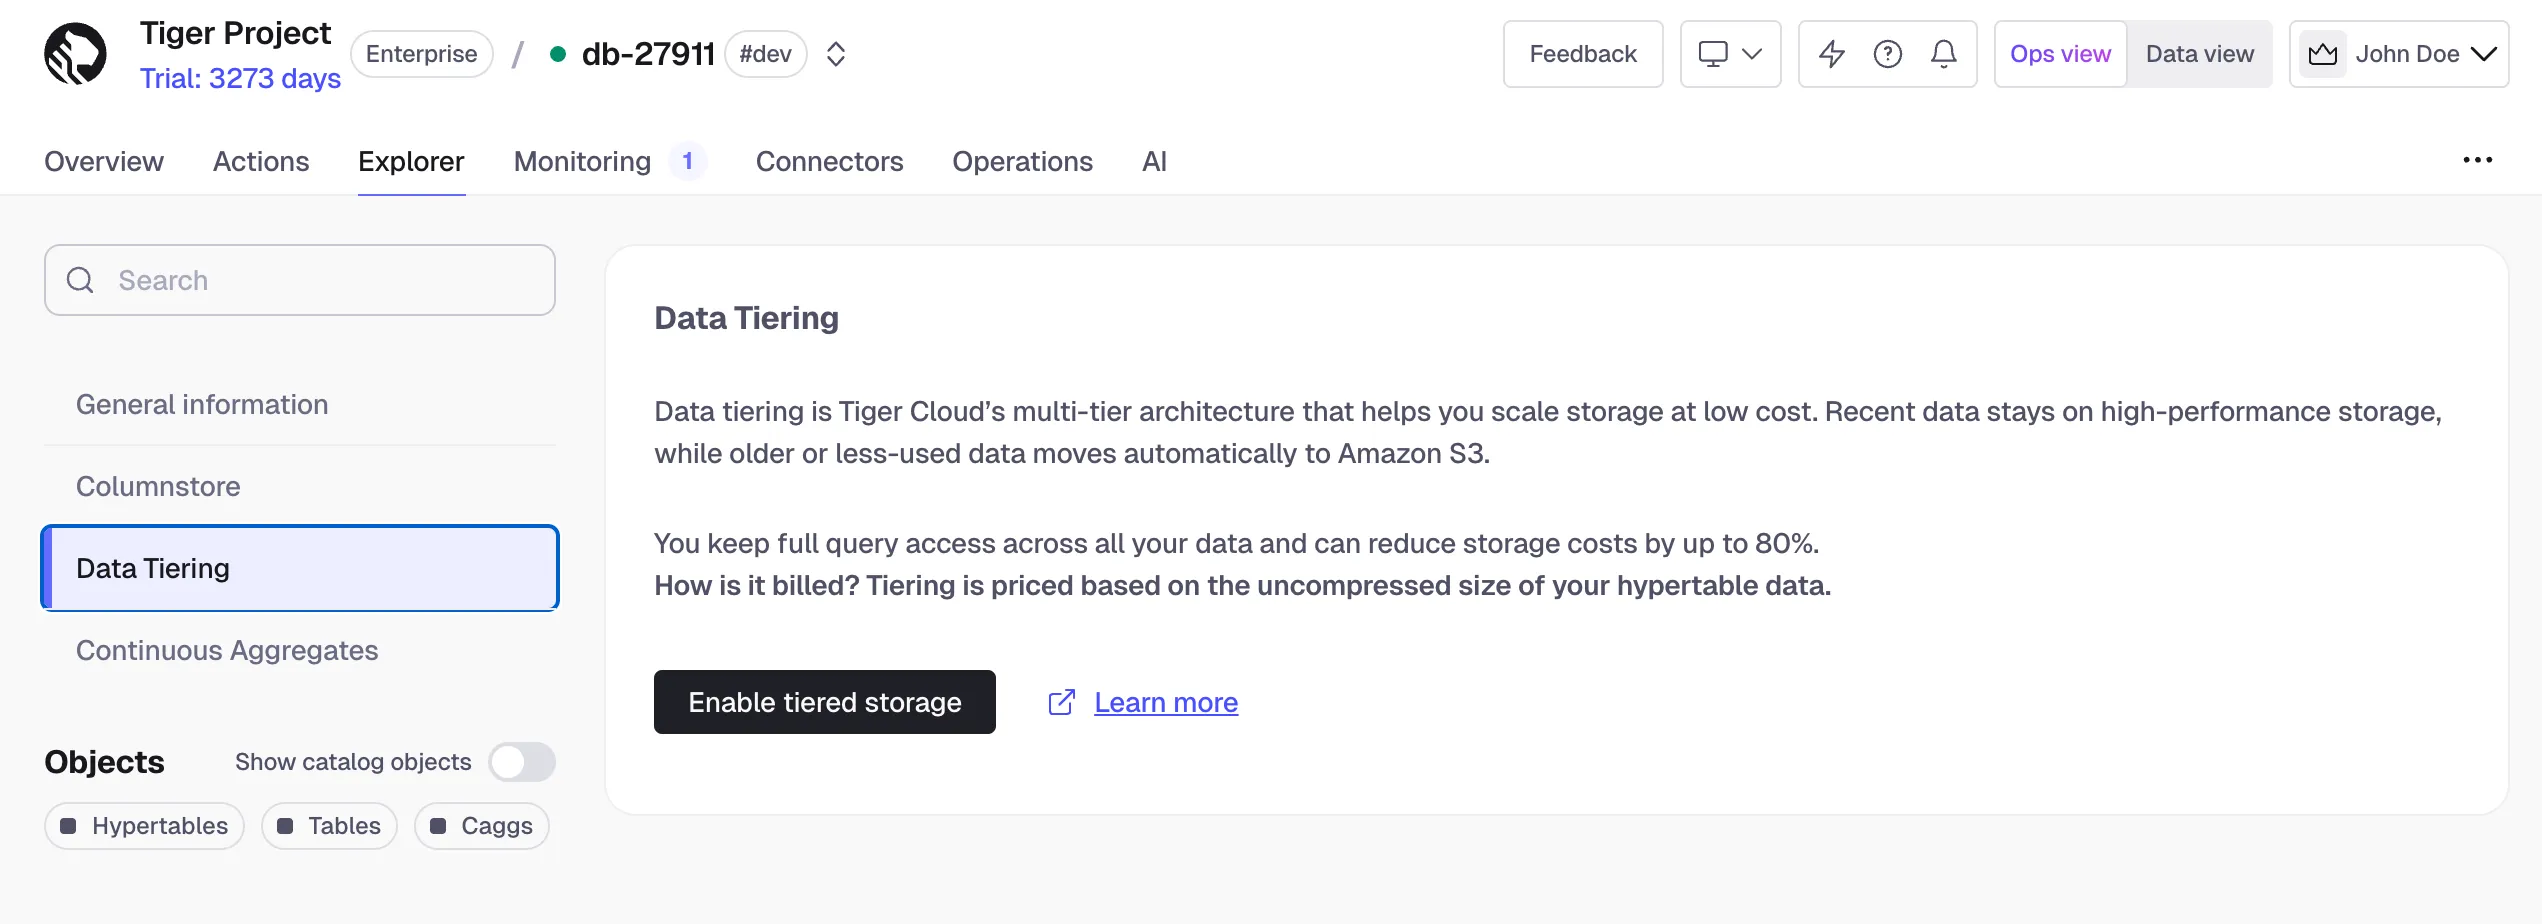
Once enabled, you can proceed to tier data manually or set up tiering policies. When tiered storage is enabled, you see the amount of data in the tiered object storage.
Automate tiering with policies
Section titled “Automate tiering with policies”A tiering policy automatically moves any chunks that only contain data
older than the move_after threshold to the object storage tier. This works similarly to a
data retention policy, but chunks are moved rather than deleted.
A tiering policy schedules a job that runs periodically to asynchronously migrate eligible chunks to object storage. Chunks are considered tiered once they appear in the timescaledb_osm.tiered_chunks view.
You can add tiering policies to hypertables, including continuous aggregates, via Console UI or an SQL editor.
Add a tiering policy
Section titled “Add a tiering policy”To add a tiering policy, connect to your service and call add_tiering_policy:
SELECT add_tiering_policy(hypertable REGCLASS, move_after INTERVAL, if_not_exists BOOL = false);For example, to tier chunks that are more than three days old in the example hypertable:
SELECT add_tiering_policy('example', INTERVAL '3 days');By default, a tiering policy runs hourly on your database. To change this interval, call alter_job.
Remove a tiering policy
Section titled “Remove a tiering policy”To remove an existing tiering policy, call remove_tiering_policy:
SELECT remove_tiering_policy(hypertable REGCLASS, if_exists BOOL = false);For example, to remove the tiering policy from the example hypertable:
SELECT remove_tiering_policy('example');If you remove a tiering policy, the remaining scheduled chunks are not tiered. However, chunks in tiered storage are not untiered. You untier chunks manually to local storage.
Manually tier and untier chunks
Section titled “Manually tier and untier chunks”If tiering policies do not meet your current needs, you can tier and untier chunks manually. To do so, connect to your service and run the queries below in the data mode, the SQL editor, or using psql.
Tier chunks
Section titled “Tier chunks”Tiering a chunk is an asynchronous process that schedules the chunk to be tiered. In the following example, you tier chunks older than three days in the example hypertable. You then list the tiered chunks.
- Select old chunks
Select all chunks in
examplethat are older than three days:SELECT show_chunks('example', older_than => INTERVAL '3 days');This returns a list of chunks:
_timescaledb_internal._hyper_1_1_chunk_timescaledb_internal._hyper_1_2_chunk - Tier each chunkSELECT tier_chunk('_timescaledb_internal._hyper_1_1_chunk');
Repeat for all chunks you want to tier. Tiering a chunk schedules it for migration to the object storage tier, but the migration won’t happen immediately. Chunks are tiered one at a time to minimize database resource consumption. A chunk is marked as migrated and deleted from the standard storage only after it has been durably stored in the object storage tier. You can continue to query a chunk during migration.
- View tiered chunksSELECT * FROM timescaledb_osm.tiered_chunks;
To see which chunks are scheduled for tiering either by policy or by a manual call, but have not yet been tiered:
SELECT * FROM timescaledb_osm.chunks_queued_for_tiering;Untier chunks
Section titled “Untier chunks”To update data in a tiered chunk, move it back to the standard high-performance storage tier in Tiger Cloud. Untiering chunks is a synchronous process. Chunks are renamed when the data is untiered.
- Check which chunks are tieredSELECT * FROM timescaledb_osm.tiered_chunks;
Sample output:
hypertable_schema | hypertable_name | chunk_name | range_start | range_end-------------------+-----------------+------------------+------------------------+------------------------public | sample | _hyper_1_1_chunk | 2023-02-16 00:00:00+00 | 2023-02-23 00:00:00+00(1 row) - Call
untier_chunkCALL untier_chunk('_hyper_1_1_chunk'); - Verify the chunk detailsSELECT * FROM timescaledb_information.chunks;
Sample output:
-[ RECORD 1 ]----------+-------------------------hypertable_schema | publichypertable_name | samplechunk_schema | _timescaledb_internalchunk_name | _hyper_1_4_chunkprimary_dimension | tsprimary_dimension_type | timestamp with time zonerange_start | 2023-02-16 00:00:00+00range_end | 2020-03-23 00:00:00+00range_start_integer |range_end_integer |is_compressed | fchunk_tablespace |data_nodes |
Drop tiered data
Section titled “Drop tiered data”To drop tiered data, call DROP TABLE on the corresponding hypertable. This removes the hypertable and all its associated data from the high-performance and low-cost storage.
Disable tiering
Section titled “Disable tiering”Contact Tiger Data support if you are disabling tiering when moving from Scale to Performance pricing plan.
If you no longer want to use tiered storage for a particular hypertable, drop the associated metadata by calling disable_tiering.
- Remove tiering policies
Drop all tiering policies by calling
remove_tiering_policy. - Check for tiered data
Make sure that there is no tiered data associated with this hypertable:
-
List the tiered chunks:
SELECT * FROM timescaledb_osm.tiered_chunks; -
If you have any tiered chunks, either untier this data, or drop these chunks from tiered storage.
-
- Disable tieringSELECT disable_tiering('my_hypertable_name');
- Verify tiering is disabledSELECT * FROM timescaledb_osm.tiered_hypertables;